Professional Photo Editing Tips for Beginners
For photographers, social media users, and content producers, photo editing is a crucial ability. Learning the fundamentals of photo editing is essential whether you want to improve your vacation photos, make captivating social media posts, or produce high-quality images. In order to help novices hone their editing abilities and produce amazing results, this guide offers a thorough examination of necessary tools, detailed methods, and best practices.
1. Choosing the Right Photo Editing Software
Before diving into editing techniques, it’s important to choose the right software. Here are some popular options:
Adobe Photoshop: Professionals worldwide use Photoshop, the industry standard for photo editing software. It is a component of Adobe Creative Cloud, a cloud-based ecosystem of high-end creative applications. When you purchase a subscription to the main program, you also get the desktop installable version and the mobile Photoshop Express app.
Photoshop has many features and tools for editing, including AI-powered ones. It also allows you to edit multiple photos at once and uses the layers concept, which prevents the original file from being destroyed or permanently altered. You make changes to a new layer of your image (you can duplicate layers as well), and each layer of edits can be saved separately.
All of this indicates that for novices, it can be a fairly complicated tool. Nonetheless, Adobe provides a vast library of Photoshop tutorials for both novice and expert users, in addition to numerous courses devoted to learning the program.
Adobe Express: A photo editor, stock media libraries, AI editing tools, and much more can be found on Adobe Express, a simplified graphic design tool that combines the best features of Adobe’s main applications, such as Photoshop, Illustrator, and Premiere Pro, into a single, user-friendly platform. It’s perfect if you enjoy Photoshop’s features but find its intricate layout difficult to use.
Although Adobe Express is free to use, a premium membership is required to access the full functionality of the service.
Adobe Lightroom : A powerful and user-friendly tool designed for quick edits, advanced color corrections, and efficient batch processing, making it a favorite among photographers.


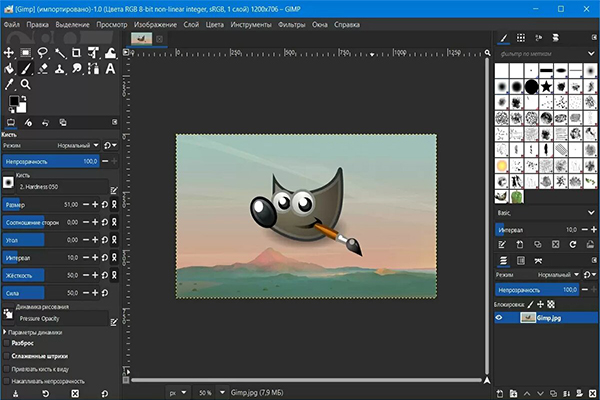
GIMP: A powerful, free, open-source alternative to Photoshop, offering a range of advanced features for photo manipulation and design.
Pixlr: A variety of editing tools and features are available in the free online photo editor Pixlr. Pixlr X, its beginner-friendly version, is excellent for simple and quick designs. Pixlr R is a sophisticated editing tool that allows you to do extensive photo editing.
Although the free accounts have limited access, this platform is excellent for amateurs who do not want to invest in costly software because it has AI features.Paid subscriptions are available for the full range of the service, including its most potent features.
Canva: Canva Pro is a well-known, easy-to-use, and reasonably priced graphic design platform with AI capabilities, stock photos and templates, and photo editing tools. To get good results, it doesn’t require any special skills and is highly intuitive. Despite having a very straightforward concept, it still has sophisticated features like a layers panel. It’s excellent for producing marketing collateral and social media graphics, among other brief but crucial visuals.
Unlimited use of the service is included with a Canva Pro subscription, which can be either monthly or yearly. Additionally, it offers a vast library of tutorials to help you get the most out of the tool.
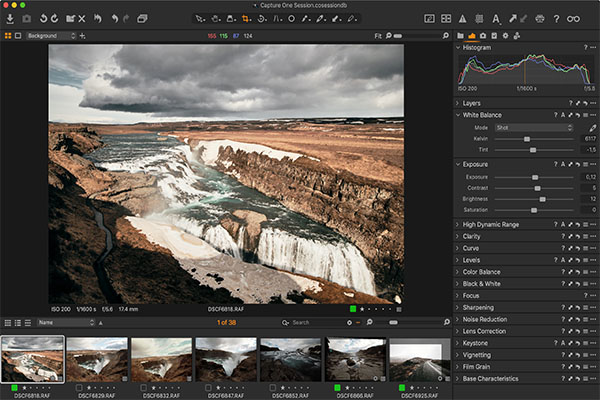
Capture One: A high-end choice for professional photographers, offering exceptional RAW file handling, precise color grading, and tethered shooting capabilities.
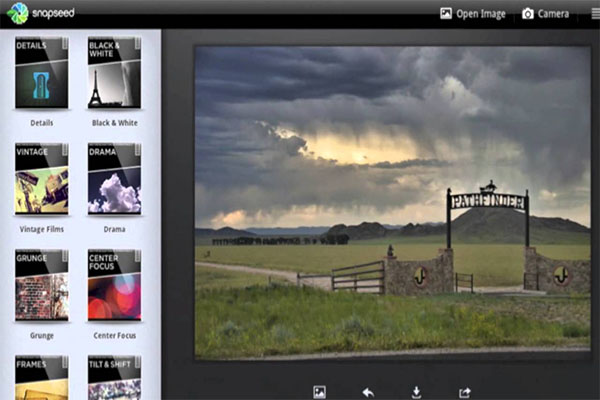
Snapseed : A versatile and user-friendly mobile app offering advanced editing tools, including selective adjustments, healing features, and a variety of professional filters.
Each tool has its unique features, so experiment to find what works best for you.
2. Understanding Basic Photo Editing Concepts
a. Resolution and Image Quality
Begin by using high-resolution images to maintain quality and avoid pixelation, ensuring finer details remain intact. Additionally, always create a backup of the original file before making any modifications to prevent irreversible changes.
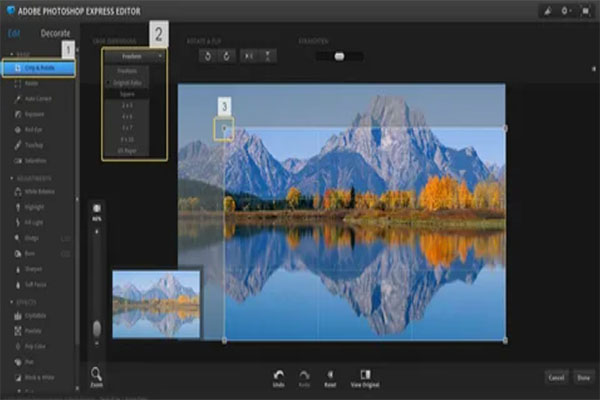
b. Cropping and Composition
Cropping and straightening your photos is one of the simplest ways to enhance or correct their composition. Cropping an image allows you to improve symmetry, define or accentuate the focal point, remove extraneous background, adjust the photo size, aspect ratio, and angle, and correct the composition frame. Straightening your tilted photos is a fairly simple process that will make sure they are eye-friendly and level with the horizon. However, you can use the same tool to intentionally tilt an image for artistic purposes if you’d like.
The majority of software options manage cropping and straightening using level controls and/or a drag-and-drop square selection tool, making it incredibly easy to complete.
c. Adjusting Exposure
To control how light or dark an image appears, exposure and brightness adjustments are crucial tools in photo editing. Both have an impact on how the image feels overall, and knowing how they differ can help you make the ideal edit.
It’s possible to fix an underexposed (too dark) or overexposed (too bright) photo that would otherwise work well for your design by adjusting the exposure while editing. Additionally, altering an image’s exposure can enhance its contrast and brightness, giving it a sharper, more appealing appearance.
There will probably be a tool in your preferred photo editor to change the exposure of your image as a whole. It may have controls for exposure values, such as camera-related controls like shutter speed, ISO, and aperture, or image-based controls like brightness and contrast, that you can use to adjust image exposure. It may also be labeled “exposure” directly.
d. Adjust Brightness and Contrast
By simultaneously altering the intensity of each pixel, brightness describes how light or dark an image is overall. The visual “feel” of the image is influenced by brightness, whereas exposure determines how much light is captured. The brightness setting can improve the overall light levels, highlighting more details or making the image appear lighter.
The entire image appears lighter and more vibrant when the brightness is increased. For dark photos, this can be helpful, but be careful not to overexpose certain areas of the picture.
A more dramatic or moody effect is produced by darkening the entire image with decreasing brightness, but too much darkening can obscure crucial details in the shadows.
e. Color Correction and White Balance
White balance and color correction are crucial editing tools
Two essential methods for making sure your images capture the natural lighting and color are color correction and white balance. These changes improve the overall look of your image, correct color imbalances, and eliminate undesirable color casts.
Adjusting Colors
To get more accurate and aesthetically pleasing results, color correction entails modifying the colors in your picture. When an image seems overly saturated, drab, or has colors that don’t look natural, this is important.
The following are the main components of color correction:
Saturation: Regulates color intensity. An image with high saturation may appear unduly colorful, while one with low saturation may appear lifeless.
Hue: Modifies the colors on their own. Any color shifts that might have happened during filming can be corrected with this.
By enhancing the contrast between areas of light and dark, contrast contributes to the creation of a more dynamic image.
To guarantee accurate color representation, first adjust the white balance (described below) before applying color correction. After that, adjust the hue and saturation to create a balanced picture that faithfully captures the scene.
White Balance
In order to make the whites in your image appear neutral and the other colors are accurate, white balance is the process of eliminating color casts from various light sources. The white balance must be adjusted for various lighting conditions, such as fluorescent lights (which can make images appear cooler or greener) or tungsten bulbs (which cast a yellow/orange tint). Automatic White Balance (AWB): Usually accurate, but not always.
Manual Adjustment: More accurate control is possible by using sliders for tint (to correct green or magenta casts) and temperature (to change warmth or coolness).
While color correction enhances those colors for the ideal outcome, proper white balance guarantees that your image has natural colors. When combined, they guarantee that your pictures look their best.


3. Essential Photo Editing Techniques
a. Using Layers (Photoshop)
Photoshop layers are essential for non-destructive editing. By separating various components of your image, layers enable you to edit, remove, or modify them more easily without affecting the final product. Certain layers can have modifications, filters, and effects applied to them while maintaining the original content. You can make changes to brightness, contrast, and hue using adjustment layers without permanently changing the image. Selective editing, which allows you to conceal or expose portions of a layer, is made possible by layer masks. You have more freedom and control when you use layers, which makes it simpler to try out different edits and keep your workflow editable.
b. Retouching and Spot Healing
Photoshop spot healing and retouching are crucial for eliminating flaws and improving the overall caliber of your photos. Dust spots, minor blemishes, and other flaws can be easily removed with the Spot Healing Brush Tool. Photoshop will automatically blend the area you want to fix with the surrounding pixels if you just click on it. The Healing Brush Tool allows you to sample an area to match the color and texture for greater control. Retouching is the process of enhancing features or smoothing skin while maintaining the image’s organic appearance. These tools aid in producing polished, faultless photos.
c. Sharpening and Noise Reduction
Two essential image editing techniques that help strike a balance between clarity and detail enhancement are sharpening and noise reduction. Sharpening improves the definition of small details, sharpening edges and giving the picture a more polished look. To sharpen photos in Photoshop, use the High Pass Filter or Unsharp Mask. While the High Pass Filter sharpens particular details when used in conjunction with an Overlay blending mode, the Unsharp Mask provides control over the Amount, Radius, and Threshold to modify the sharpening effect’s strength, spread, and contrast.
Sharpening, however, can also make noise more noticeable, particularly in photos with high ISO or low light levels. Noise reduction becomes crucial at this point. To smooth out grainy areas, Photoshop provides tools like Reduce Noise under Filter > Noise > Reduce Noise. To achieve the ideal balance, you can move the sliders for Strength, Preserve Details, Reduce Color Noise, and Sharpen Details.
It’s crucial to apply noise reduction and sharpening in phases when working with both. After smoothing out any grainy areas with noise reduction, sharpen the image. To ensure sharpness without adding extraneous noise or artifacts, apply these adjustments selectively using layer masks. Images produced by this combination are crisp and detailed.
d. Working with RAW Files
There is more flexibility and control over image editing when working with RAW files in Photoshop. Compared to JPEGs, RAW files retain more information and enable non-destructive exposure, white balance, and contrast adjustments. The Camera Raw dialog box opens when you open a RAW file in Photoshop, providing you with a wealth of settings. Without sacrificing quality, you can adjust the image’s color temperature, clarity, highlights, and shadows. RAW files are perfect for professional photographers because they enable substantial post-production adjustments. After editing, the image can be saved in a high-quality format such as PSD or TIFF.
e. Using Presets and Filters
Photoshop presets and filters are a simple and efficient way to add professional-looking effects to your photos. Presets are pre-configured adjustments that give your photo a particular style or appearance, like adjusting colors or boosting contrast. They are ideal for preserving uniformity among several pictures. The Filter menu contains filters that apply artistic effects like texture, sharpening, or blur and can significantly alter the mood of your picture. You can save time while still fine-tuning the final appearance by further customizing both presets and filters.
4. Advanced Editing Tips
a. Dodging and Burning
In order to improve contrast and detail, certain areas of an image can be made lighter (dodge) or darker (burn). In Photoshop, you can use the Burn Tool to add depth to shadows or the Dodge Tool to brighten highlights. These techniques aid in giving your picture more depth and focus.
b. Color Grading
The technique of altering an image’s colors to produce a particular mood or aesthetic is known as color grading. You can adjust tones, shadows, and highlights in Photoshop by using tools like Color Balance, Hue/Saturation, and Curves. This method is frequently employed in film and photography to improve images and arouse feelings.
c. Background Removal
One common method for separating subjects from their surroundings in Photoshop is background removal, which gives editors more creative freedom. To eliminate a background, choose the subject using the Pen Tool or Quick Selection Tool. While the Pen Tool provides accuracy for more intricate shapes, the Quick Selection Tool is best for automatic selections. Once the subject has been chosen, smooth or feather the selection by adjusting the edges using the Select and Mask workspace. The background can be changed or removed after the subject has been isolated. This method is frequently employed in design work, portrait editing, and product photography.
d. Blending and Masking
Photoshop’s blend and mask functions enable smooth layer transitions. The interaction between layers, which is managed by layer modes like Overlay or Multiply, is referred to as blending. By using a mask to non-destructively hide or reveal portions of a layer, masking enables accurate adjustments and seamless transitions without changing the original image.
5. Exporting and Saving Your Edits
a. Choosing the Right File Format
- JPEG – Ideal for web use but slightly compressed.
- PNG – Preserves transparency and high quality.
- TIFF – Best for high-resolution printing.
- PSD – Retains all layers for future editing in Photoshop.
b. Optimizing for Social Media
Each platform has different image size recommendations. Resize accordingly to maintain quality.
c. Watermarking Your Work
In Photoshop, watermarking your work entails adding a text or logo to prevent unauthorized use. To make a logo appear subtle, use the Text Tool or import one and change the opacity. To keep the watermark from detracting from the image, place it in the center or a corner.
6. Developing Your Editing Style
Trying out various editing methods enables you to create a distinctive style. While you can draw inspiration from experts, try to come up with your own distinctive style.
7. Common Editing Mistakes to Avoid
It’s crucial to stay away from common errors that can lower the quality of your images when editing them in Photoshop. Over-sharpening is one error that can result in noise or undesired halos. Another is inadequate color correction, which can make an image appear unnatural by making excessive changes to contrast or saturation. Steer clear of destructive editing.
- Over-editing – Excessive use of filters and effects can make images look unnatural.
- Ignoring skin tones – Over-saturation or incorrect white balance can distort natural skin tones.
- Saving over the original – Always keep an unedited backup file.
- Not calibrating your monitor – Colors may appear differently on uncalibrated screens.
8. Practice Makes Perfect
Practice is the best way to get better. Try out various tools, watch tutorials, and examine expert before-and-after edits.
Conclusion
Mastering professional photo editing takes time and patience, but with consistent practice, you can achieve stunning results. By following these tips, you’ll develop a strong foundation in photo editing, allowing you to enhance your images and create visually compelling content.