Travel Photography Tips for Beginners
Travel photography is an excellent way to capture the essence of your adventures and preserve memories for a lifetime. Whether you’re exploring bustling cities, tranquil landscapes, or historical sites, the right techniques can help you capture stunning photographs. If you’re new to travel photography, these essential tips will help you capture stunning images.
1. Choose the Right Gear
- Although a high-end camera can help you become a better photographer, you can start taking stunning travel photos without spending a lot of money. A carefully selected set of tools can greatly enhance your performance. The following is a list of necessary travel photography gear:
- While a DSLR or mirrorless camera can be used for a variety of purposes, a good smartphone or small camera can also yield great results.
- While a prime lens (50mm) is good for portraits, a versatile zoom lens (18-55mm or 24-70mm) is best for a variety of shots.
- For long-exposure and low-light photography, lightweight tripods increase stability.
- Make regular backups of your pictures and carry extra memory cards.
- Filters: Use a polarizing filter to enhance colors and reduce reflections in landscape photographs.
2. Learn Basic Camera Settings
Understanding the basic camera settings is crucial to capturing high-quality images:
- Aperture (f-stop): Controls the depth of field. A low f-number (e.g., f/2.8) creates a blurred background, while a high f-number (e.g., f/11) keeps more of the scene in focus.
- Shutter Speed: Determines how motion is captured. A fast shutter speed (1/1000s) freezes movement, while a slow shutter speed (1/10s) creates motion blurs.
- ISO: Adjusts the camera’s sensitivity to light. Lower ISO (100-400) results in clearer images, while higher ISO (1600-3200) helps in low light but may introduce noise.
- White Balance: Ensures natural colors in your images based on lighting conditions.
3. Plan Your Shots in Advance
A little planning can go a long way in capturing the best travel photos:
Research Locations: Look up popular photography spots, check social media, or browse travel blogs for inspiration.
- Best Time to Shoot: The golden hour (shortly after sunrise and before sunset) provides soft, warm lighting that enhances photos.
- Local Events & Culture: Capture festivals, street performances, or daily life to add a cultural touch to your images.
- Scout Locations: Arrive early to explore angles, lighting, and crowd levels before capturing your shots.
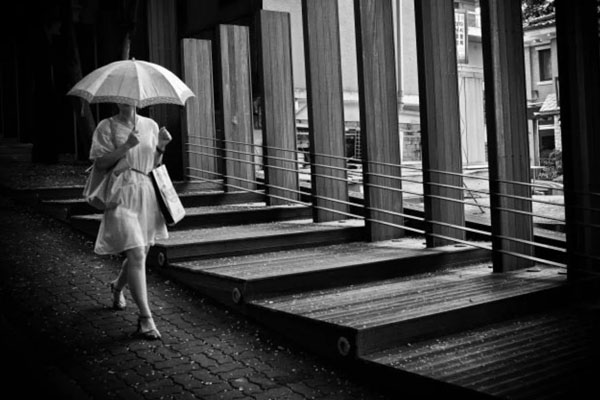
4. Master Composition Techniques
Simplicity is key to minimalism in photography. You can produce powerful, visually calming, and impactful images by concentrating on simple compositions with few elements. This method is excellent for travel photography because it brings out the beauty of a single subject or a simple scene. It also aids in expressing feelings of calm or isolation.
The following advice will help you create minimalist photographs:
Concentrate on Just One Topic:
- Make a person, thing, or feature the focal point.
- For instance, a single boat on calm water or a colorful umbrella on a beach with white sand.
Take Advantage of Negative Space:
- Give your subject a lot of empty space, such as the sky, water, or open fields.
- This draws the viewer’s attention to the main point and strengthens the sense of simplicity.
Maintain Clean Backgrounds:
- Look for pristine settings such as open horizons, snowy landscapes, or deserts.
- Steer clear of anything that might divert attention from your topic.
Employ Powerful Shapes and Lines:
- Minimalist compositions gain structure from the use of leading lines, geometric shapes, and patterns.
- For instance, the neat curves of a sand dune or a desolate road that leads into the horizon.
For example, a lonely road leading into the horizon or the clean curves of a sand dune.
Places That Are Ideal for Minimalism
Beaches: Natural minimalism is created by the contrast of the sky, sand, and water.
Deserts: Clear horizons and empty spaces draw attention to individual features like footprints or cacti.
Snowy Landscapes: Any figure or object will stand out in a scene made simpler by white snow.
Urban Areas: Simple architectural elements, such as a single window or lamppost, can create striking minimalist subjects.
Expert advice: Don’t be scared to slightly underexpose your photos. By emphasizing shapes and light rather than colors and textures, this can help streamline details and improve the mood.
5. Capture the Essence of a Destination
Go beyond typical tourist shots and try to tell a story through your images:
- People & Portraits: Capture locals in their natural environment, showing expressions and emotions.
- Food Photography: Showcase local cuisine, street food, or traditional dishes to add cultural context.
- Architecture & Landmarks: Experiment with different angles to make famous sights look unique.
- Night Photography: Try capturing city lights, starry skies, or illuminated landmarks.
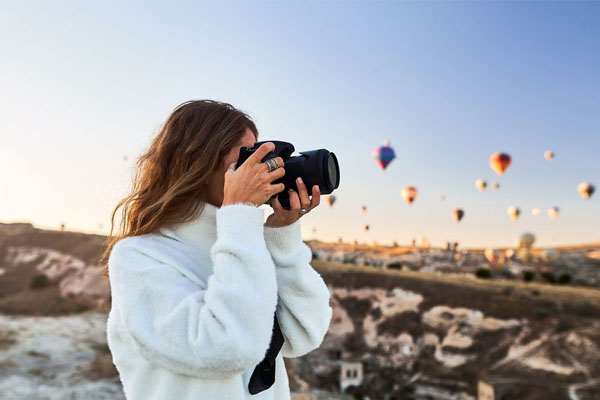
6. Utilize Natural Light
Do you want to capture the perfect trip photo? To give your photos depth and dimension, use natural light. And really, who wouldn’t want to use what they already have to create incredibly beautiful shots? The deal is this:
Simply put, natural light—which includes some of the best light you will ever work with—comes from the sun, moon, and stars. It can be dramatic and moody at sunset and sunrise, or it can be warm, gentle, and beautiful during the golden hour. What’s the best part? It’s free!
How can you maximize it, then? First and foremost, you should attempt to take pictures in the warm, soft light of the early morning or late afternoon. The sun is lower in the sky at this time, creating stunning, golden light that can enhance your photographs. Whether you’re taking street, portrait, or landscape photos, you can also use the light to give your images depth and dimension.
Here’s a quick tip: if the sun is behind your subject in a portrait, try placing them so that the sun is to the side or just behind them. This will produce a beautiful backlit effect that will draw attention to your subject and highlight them.
You can improve your travel photography by utilizing natural light, which is your friend! Make the most of it, though, by taking pictures during the golden hour and utilizing the light to give your images depth and dimension. Have fun taking pictures!
7. Edit Your Photos for a Polished Look
Post-processing can elevate your travel photos:
- Use Editing Software: Adobe Lightroom, Photoshop, or mobile apps like Snapseed and VSCO can help enhance your images by adjusting colors, exposure, and sharpness for a more professional look.
- Adjust Brightness & Contrast: Enhance exposure levels to improve visibility, highlight key details, and create a more dynamic and engaging image.
- Color Correction: Adjust white balance, saturation, and vibrancy to ensure accurate and visually appealing colors while preserving natural tones.
- Crop & Straighten: Adjust the framing to eliminate distractions, improve alignment, and create a visually balanced composition that enhances the subject’s impact.
8. Keep Your Gear Safe While Traveling
Protecting your photography equipment while traveling is crucial:
- Use a Padded Camera Bag: Protects your gear from damage and theft.
- Carry a Rain Cover: Essential for shooting in unpredictable weather.
- Be Aware of Your Surroundings: Avoid displaying expensive gear in crowded places.
- Backup Your Photos: Use cloud storage or an external hard drive to prevent data loss.
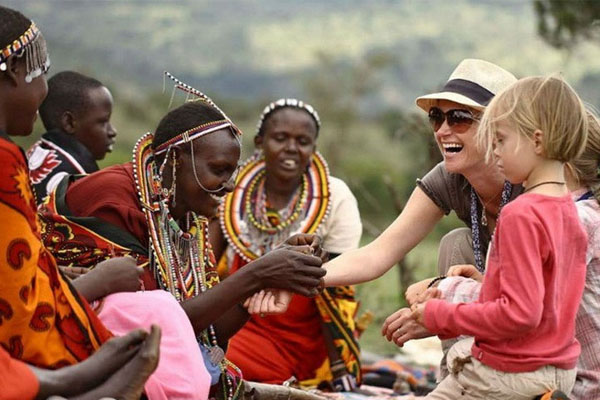
9. Engage with Locals and Respect Cultures
Photography is not just about taking pictures; it’s about capturing experiences respectfully:
- Ask for Permission: Always seek consent before photographing people.
- Be Mindful of Sacred Places: Some cultural and religious sites may have restrictions on photography.
- Interact with Locals: A simple conversation can lead to more authentic and meaningful photos.
10. Practice & Experiment
The best way to improve your travel photography is to practice and experiment with different techniques:
- Try Different Perspectives: Shoot from high above, at ground level, or from unusual angles.
- Use Reflections: Capture water puddles, mirrors, or glass surfaces for creative compositions.
- Shoot in RAW Format: Provides greater flexibility for editing without losing quality.
- Challenge Yourself: Set mini-projects like photographing only in black and white or focusing on street photography for a day.
Travel Photography Tips to Know Before Your Trip
Find out what you want to see (and when).
One of the most important but often overlooked tips for travel photography is to plan ahead of time. I’m all for wandering around without a plan, but in the world of photography, preparation pays off.
Before you arrive at your destination, decide what you want to see and when. Reach out to friends and even photographers who were there. Look up the weather. Investigate what times things open, how long it will take to get from point A to B, and how much time you should spend in each location. I always use Google My Maps to plan out where I want to go and how to organize my day. Here’s a simple map I created for my day trips from Bologna, Italy last fall: Like most travelers, I use Instagram, Pinterest, blogs, and Google to plan my trips. These resources are also useful for selecting cool photo locations.
Once you’ve created a rough itinerary of the points of interest you’ll want to visit, you can start visualizing the compositions you’ll want to photograph. Your travel photography should reflect your style and niche in order to tell your story effectively.
After your trip, you should know these travel photography tips.
Your trip photos are significantly improved by post-processing.
Using programs like Lightroom, Snapseed, or Photoshop, every professional photographer edits their images. Therefore, it should be no surprise that these tools are also included in the toolbox of a travel photographer.
I used Snapseed when I first started taking pictures while traveling. I use Adobe Lightroom now. Lightroom is the greatest photo editing program available, in my opinion, and it’s well worth the $10 monthly fee.
I usually do the following to improve my travel photos in addition to cropping them:
Reduce highlights, lighten shadows, adjust color saturation and tones, enhance exposure levels and contrast, and sharpen the image.
Going overboard with edits is not something I advise since it can make your photos appear phony. However, a few easy tweaks can make a big difference in your trip pictures.
Always bring your camera with you
You should always carry a camera unless you’re going out for a night on the town, where alcohol may or may not be consumed.
I’ve discovered that the greatest photo ops frequently come as a surprise and come as no warning in my experience as a travel photographer. It pays to be prepared because anything can happen while you’re traveling, from cool street performances to rare animal sightings. Since luck is always a factor, seize the opportunity when unusual things occur.
Particularly when it comes to wildlife photography, you should be ready to take a quick picture. When these unique opportunities arise, never forget to have your camera charged and prepared.
I was going to put my camera away a few minutes after sunset. Fortunately, I caught this picture just in time as this Bighorn sheep suddenly emerged from the brush before I did.
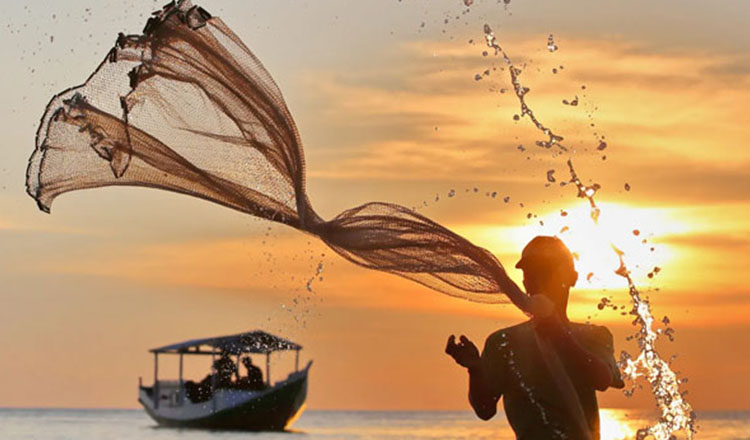
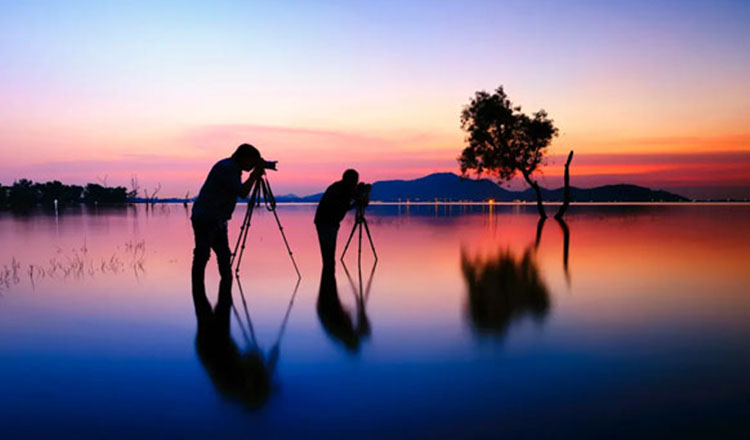
When to Take Silhouettes
Sunrise or sunset, or the “golden hour”: For silhouettes, the soft, low-angle light produces the perfect backlighting.
Scenes at Night: Backlight your subject with a bright light source, like a streetlamp or neon sign.
Dramatic Weather: Storms, fog, or clouds can heighten the silhouette effect and add atmosphere.
Methods for Taking Silhouettes
The subject should be positioned between you and the light source. The subject should be illuminated from behind.
Try different angles to make the subject’s outline as clear as possible.
The Bright Background Meter: Set the exposure to the brightest area of the scene by pointing your camera there.
This guarantees that your subject darkens while maintaining a well-exposed background.
To darken your subject and accentuate the silhouette, use Exposure Compensation or Manual Mode and reduce the exposure by one to two stops.
Configuration:
ISO: To cut down on noise, keep it low (for example, 100 or 200).
Aperture: For crisp details, use a mid-range aperture (f/8 to f/11, for example).
Shutter Speed: Modify in accordance with the illumination to guarantee that the background is properly exposed.
Pay Attention to the Outline: Make sure the topic is pertinent. Lock the autofocus on the subject’s edge and use single-point autofocus.
Make the Scene Simpler: Eliminate any background or foreground distractions. The light source and the silhouette should be the only things in focus.